
Overview
Goal: To check the status of your test environment prior to running any automated tests
Jenkins Plugins You’ll Need:
Objective: configure two Jenkins jobs. The first job captures a baseline set of data from your test environment (a baseline that usualy taken when all of your automated tests are running correctly). The second job takes a snap shot of the same data from your test enviornment prior to the execution of any automated tests. The snapshot is compared against the baseline. If the comparison failes then you know your test environment is not ready for your automated tests to run. If the comparision passes then you know that data sets or config files are set correctly before automation tests run.
For our example here we’re going to run this on a Windows client machine and use the “systeminfo” command line command to pull up all of the information about the system we’re running our tests on. We’ll save this information to the baseline file and then run the same ‘Systeminfo’ command when we run our snapshots. Note that we’ll use the full command as follows:
systeminfo | findstr /V Memory

What is Jenkins and How to Install Jenkins
Checking Test System Environment Before Starting Your Tests
Test Automation Execution based on App Version Updates
Re-running A Failed Automated Test Automatically With Jenkins
Running Data Driven Tests with the Matrix Project Plugin
This will remove the system information regarding the ‘Memory’ values as these are very likely to change from baseline to snapshot.
The core concept here is that you run the ‘Baseline‘ job when you know your environment is in a good state. You run the baseline job and it stores a set of files that act as the known good data set. Subsequent runs of the ‘Snapshot‘ job will compare against this baseline data set.
The other thing worth mentioning is that we can build a little bit of inteligence into this process by getting the baseline job to only look at data and config that relates to our test data. For example if we have a data driven automated test that uses CSV or Database data then we’ll want to use this data as a reference when we create our baseline. In the 2nd part to this example we’ll look at how we can fold this sort of process into the mix.
What We’re Aiming For
You will create two Jenins jobs. A “baseline” job and a “snapshot” job.
You’ll run the first “baseline” job and it will capture a data set (text files, csv files, sql query results, etc) and store those files as a set of artefacts within the “baseline” job. Artefacts are just outputs from the runs of a Job that are stored for posterity (or rather comparision purposes).
Then you’ll run a second “snapshot” job that captures the same data set. This second data set will be compared against the baseline data set. This second “snapshot” job will be run just before you kick off all your automated test jobs. Once the “snapshot” data has been collected you’ll then compare it against the “baseline” data.
These data capture scripts (run as part of the job) are common to both ‘Baseline’ and ‘Snapshot’ jobs. Ideally they should be stored in a source code repository like Git or SVN. For the purpose of this exercise though we’ll create these scripts directly in the Jenkins jobs (so not stored in SVN or GIT).
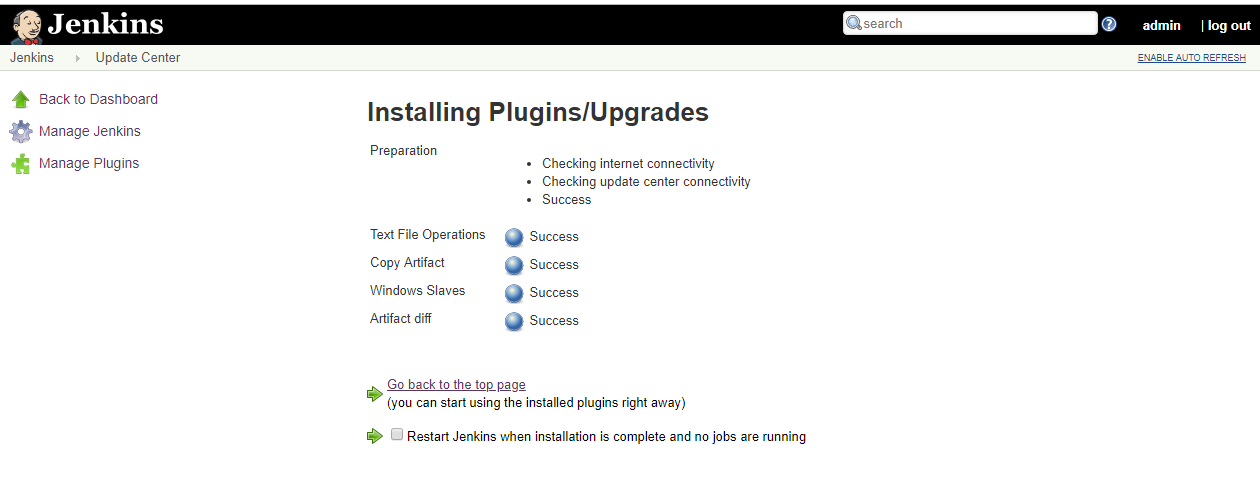
Install Additional Plugins
The core plugin for this example is the Copy Artifact Plugin which is needed to copy the Baseline files to the snapshot job/build so that the comparision can be carried out. Also used is the Artifact+Diff+Plugin which compares the files from the baseline to the snapshot (this is optional really as you have Windows file compare commands and linux diff commands you can use if need be).
You’ll want to find these three plugins
- Copy Artifact
- Text File Operations
- Artifact diff
Simplest way to install them is just select them on the Plugin Manager page under the ‘Available’ tab then click the ‘Install without restart’
Or you can download the latest .hpi file using the link below and install it manually in your instance of Jenkins
https://updates.jenkins-ci.org/download/plugins/
Note that we’re only installing the Text File Operations plugin because we want to use this in our example below to create a data file for our tests. This plugin isn’t really needed to run the core functionality we’re discussing here.
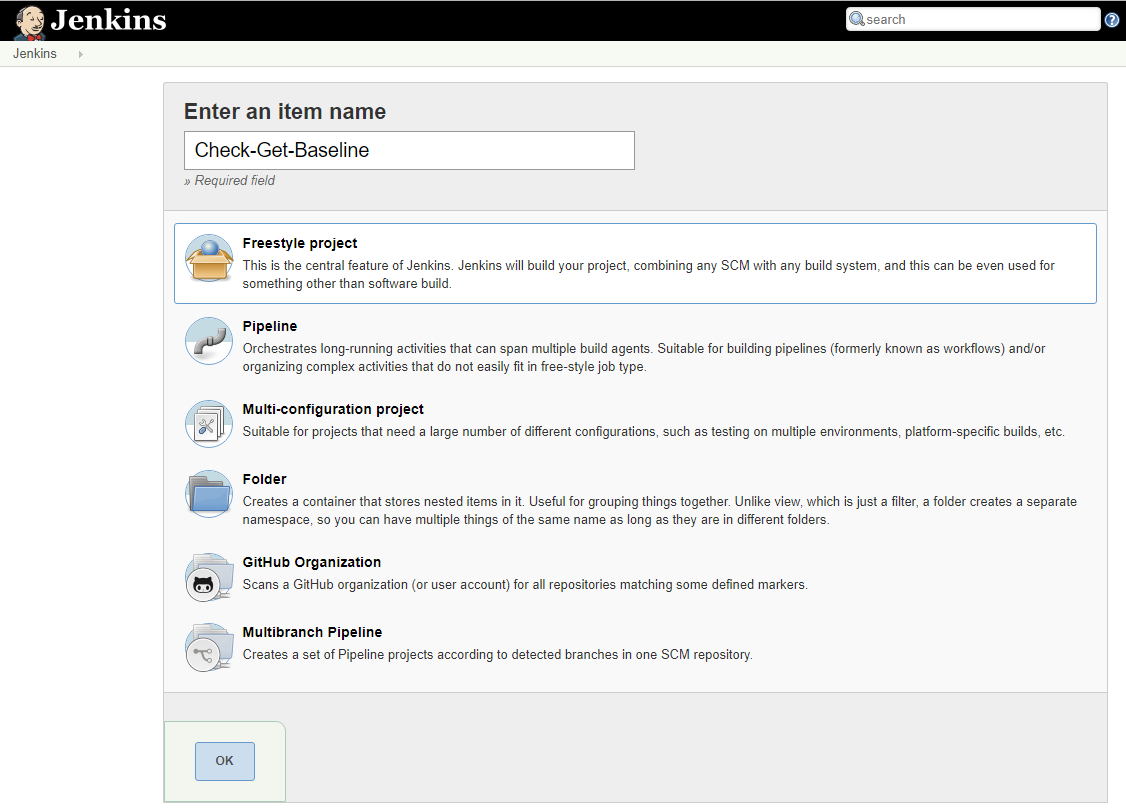
First we create our baseline job. This is the job that captures some data about our system under tests and stores it in some flat files to be used for comparision purposes later. Create the first job by clicking on the New Item link, enter the job name and select Freestyle project. You can call the first, baseline, job “Check-Get-Baseline”
In the ‘Build’ section of the job configuration add an “Execute Windows Batch Command” build step and add the following batch commands:
systeminfo | findstr /V Memory > baseline.txt dir
What this will do is list all the system information, filter out (throw away) the lines related to the Memory information. We don’t want the Memory information because it’s valid for that information to change from one run to the next (if we were to include it we’d see a difference between our baseline and snapshots every time – which defeats the object of this). Once we have all the system information we’ll send it to a file baseline.txt.
This should look like this…
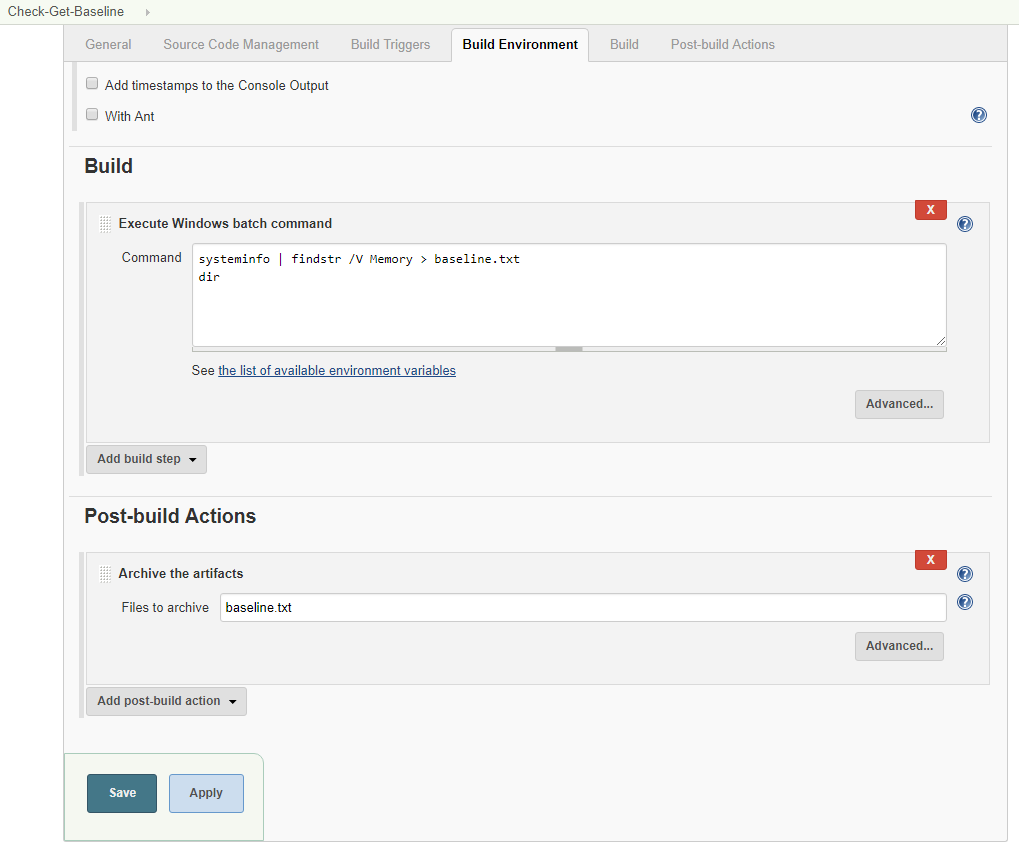
Next we want to make sure we keep this baseline.txt file. So we’ll archive this file as part of the Post build actions. Add a post build action “Archive the artifacts” and specify ‘baseline.txt’ as the file to archive.
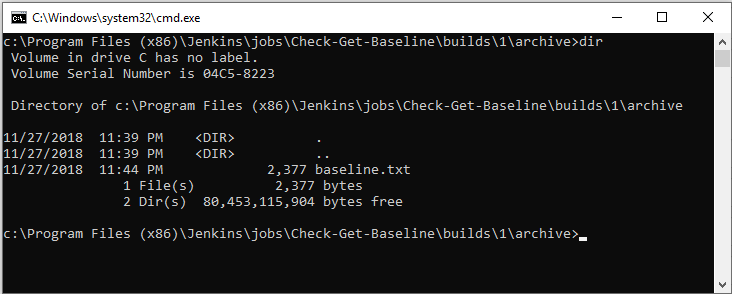
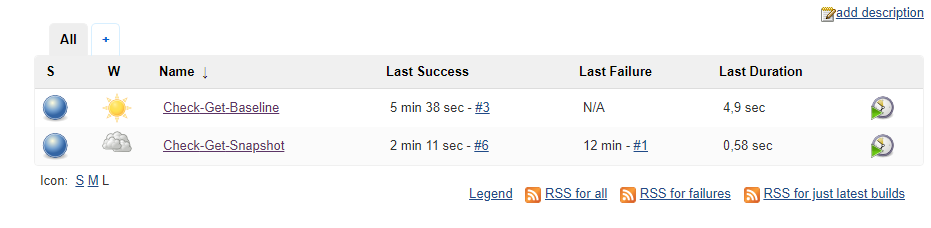
Save the job and then run it (build now). Once that first run is complete we should be able to drill down into the first build (build #1) and see the build artifacts.
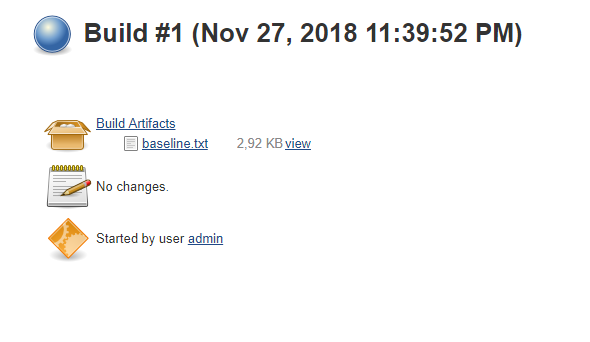
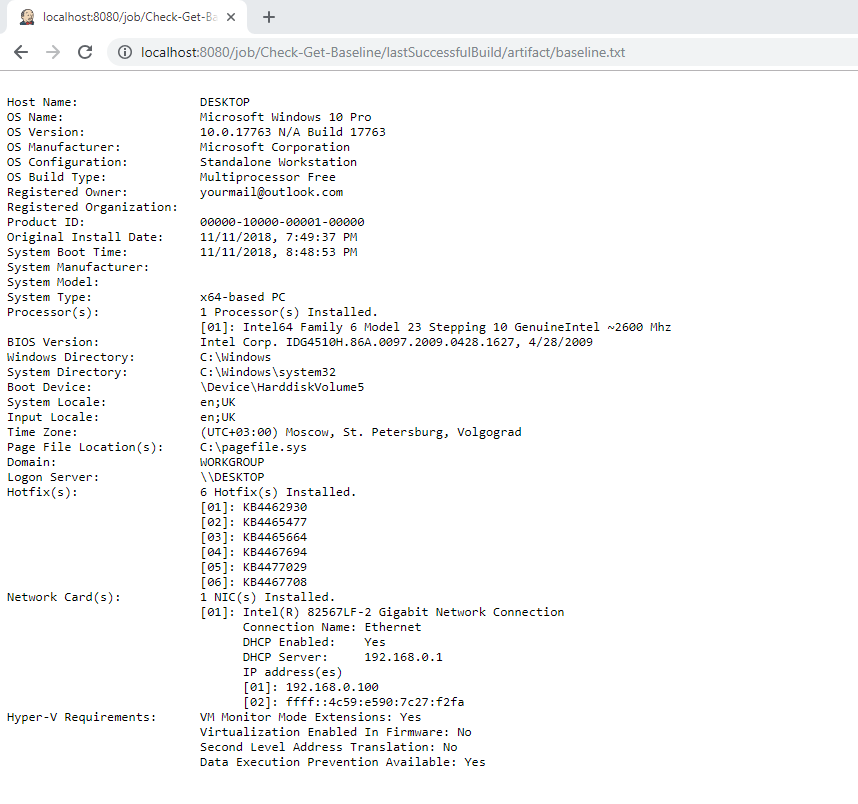
If you click on the build artifact for ‘baseline.txt’ (the view link) you should see the text display of your system information (minus the memory information).
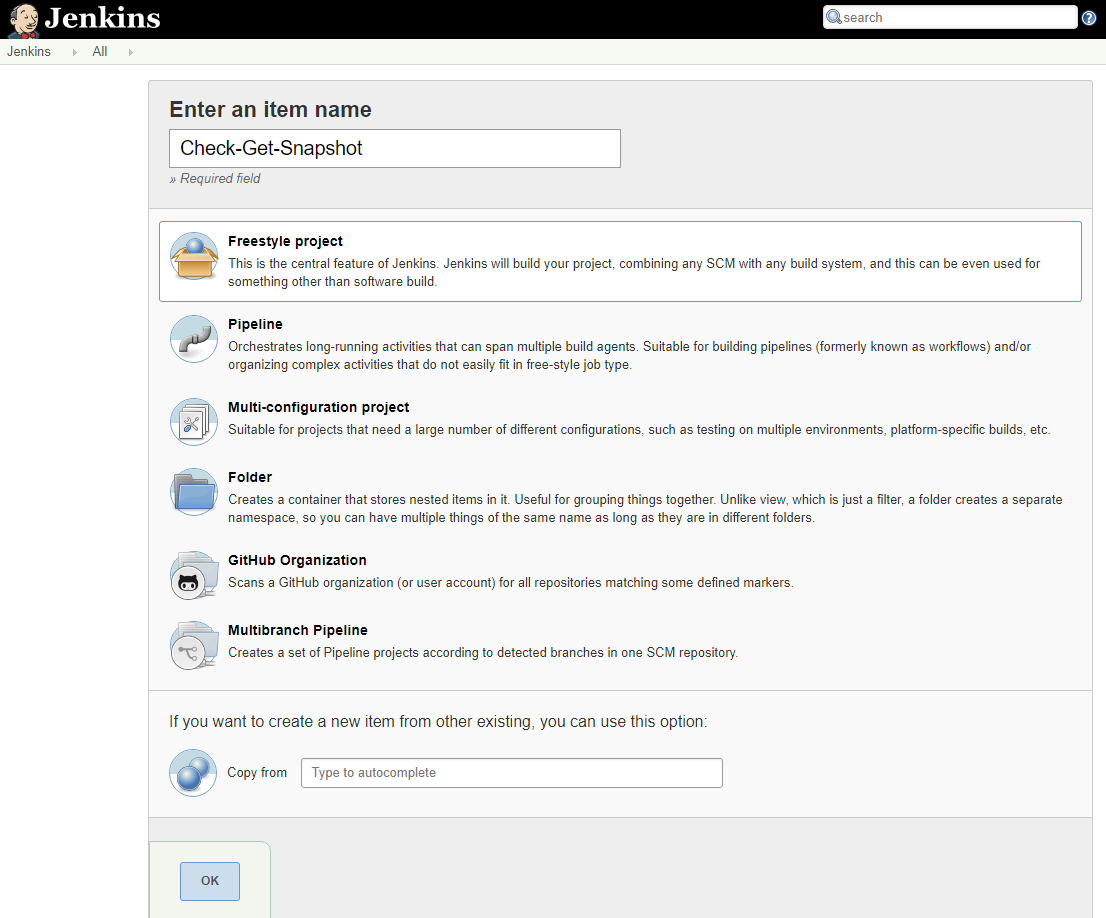
Next then we need to create the snapshot job. For this create another job (go back to the Jenkins home page and click the New Item link). So create another ‘Freestyle project’ and call this job “Check-Get-Snapshot”.
For this job we’ll need to run the same systeminfo command and store that information in another (snapshot) file. Then we’ll need to pull the ‘baseline.txt’ system information into this job and compare the baseline and snapshot.
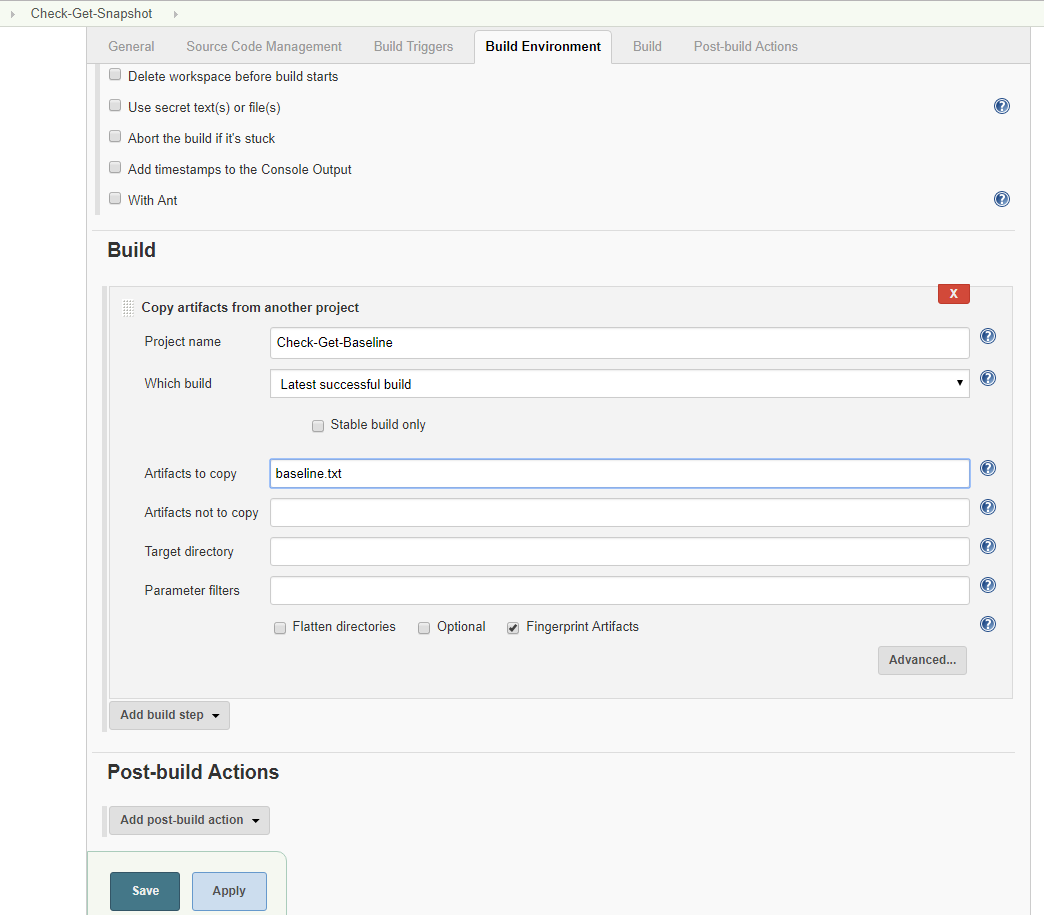
Next then create a build step ‘Copy artifacts from another project’. And in this build step ener the following information:
Project Name: Check-Get-Baseline
Which build: Latest Successful Build
Artifacts to copy: baseline.txt
Leave everything else as it is, so that the build step looks like this:
Next then add a 2nd Build step, an “Execute Windows Batch Command” build step and add the following batch commands:
systeminfo | findstr /V Memory > snapshot.txt dir
Note that the output from the systeminfo command is now being saved to a file called ‘snapshot.txt’. This will create our snapshot text file that we’ll compare against our baseline. This should look similar with baseline.txt above
Finally one more “Execute Windows batch command box”, where we’ll compare the two files. So in this “Execute Windows batch command box” build step enter the command:
FC baseline.txt snapshot.txt
This is Windows way of doing a file compare (FC) between the two files. Save this job.
We’ll run this job (click “Build Now”) and check the ‘Console’ output for the job. So click on the build (#1) and then click on ‘Console Output’. What you should see first is that both the baseline.txt files and snapshot.txt files are listed in the workspace as follows:
Directory of C:Program Files (x86)JenkinsjobsCheck-Get-Snapshotworkspace
07/11/2018 18:40
And that the comparison of the two files took place as part of the run too. This gives something like…
C:Program Files (x86)JenkinsjobsCheck-Get-Snapshotworkspace>FC baseline.txt snapshot.txt
Comparing files baseline.txt and SNAPSHOT.TXT
***** baseline.txt
Processor(s): 1 Processor(s) Installed.
[01]: Intel64 Family 6 Model 94 Stepping 3 GenuineIntel ~902 Mhz
BIOS Version: HP P01 Ver. 02.13, 08/01/2018
***** SNAPSHOT.TXT
Processor(s): 1 Processor(s) Installed.
[01]: Intel64 Family 6 Model 94 Stepping 3 GenuineIntel ~3408 Mhz
BIOS Version: HP P01 Ver. 02.13, 08/01/2018
*****
In my example you’ll see that the files did NOT compare favourably. There is a difference in the clock speed between the baseline and the snapshot. Couple of options if the initial baseline and snapshot don’t match…
- re-run the baseline to get a new baseline
- update the baseline to remove info that might change from one run to the next (using findstr)
In my case I ran the baseline again (to update the baseline information), then ran the snapshot again. The comparision the 2nd time round for me was a success. And the snapshot/baseline comparision passed
And when we check the console logs for the last Check-Get-Snapshot run we see a more favourable result:
C:Program Files (x86)JenkinsjobsCheck-Get-Snapshotworkspace>FC baseline.txt snapshot.txt
Comparing files baseline.txt and SNAPSHOT.TXT
FC: no differences encountered
We now have a check that we can run before all our automated test run. A check that can ensure our environment or system is in a fit state to run these automated tests.
Summary
In the example we’ve created above we’ve used a pretty basic ‘systeminfo’ command to check the status of the system. In a real setup we’d be using something a little (or a lot) more advanced.
These commands to capture baseline and snapshot data would include SQL statements, config file checks, etc etc. You could also consider running the snapshot check on a regualr basis with the ‘Build Periodically’ option from the Build Triggers. Or you could chain this job to run before other jobs are run. If the data capture scripts you need get particularly complicated you add the scripts to a source code repository and check them out at the start of the job. There are lots of options from here.
What we’ve given you above though is the basic framework that will allow you to make these checks and help you build on the stability of your overall automated testing efforts.